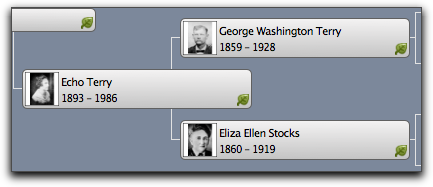
 Adding and changing a portrait in Family Tree Maker for Mac 2 (2012) is one of the activities that isn’t very Mac-like. Mac users expect intuitive control of an app. The intuitive action here is to drag and drop the image onto the portrait in the pedigree view or editing panel. Alas, it doesn’t work that way yet.
Having pictures of my ancestors in my pedigree view helps me connect to my main purpose while doing family history research: to revive and keep their stories alive. Like you, I do this by discovering and crafting stories about them that my family members are eager to hear and share. Their faces help create a sense of familiarity.
Adding a Portrait to FTMM2
There are two places where you can add or change a portrait: the people workspace or the media workspace. The specific steps differ a bit between the two. I’ll describe the general steps for both below and show you the specifics in the accompanying video.
People Workspace
If the image is already in your media library:
- Change to the Person Workspace
- Click on the person to set the focus on them
- Control-click the portrait spot in the editing panel
- Select Link to Existing Picture
- Choose the desired image in the Find Media Item window
If the images in not yet in your media library:
- Change to the Person Workspace
- Click on the person to set the focus on them
- Control-click the portrait spot in the editing panel
- Select Add New Picture
- Choose the desired photo
Media Workspace
If the image is already in your media library:
- Change to the Media Workspace
- Click on the desired image
- Click the Links toolbar button in the editing panel
- Click the Add new media link button
- Click Link To Person… from the drop-down menu
- Select the person
If the images in not yet in your media library:
- Change to the Media Workspace
- Click Add on the workspace toolbar
- Choose the media source from the drop-down menu
- Get the photo from the chosen media source
- Now that the image is in your media library, follow the steps in the previous list
How to Get the Most Out of This Tutorial
Every time I write step-by-step instructions I’m reminded why I started creating videos for you. Videos make it quicker and easier to understand a method. It takes me much longer, and I think it’s worth it.
Watch this video and apply the lessons in your Family Tree Maker for Mac database. It will help vitalize your ancestors in your mind’s eye and cement the methods in your memory.
Thanks, Ben. I discovered these steps myself when getting used to navigating FTM for Mac, version 1. I had been using (and still use) iFamily, which has allowed drag and drop for pictures from the outset. I e-mailed and talked with a support person at Ancestry, pointing out that drag and drop technology has been around for about 25 years. He said something sort of like “Hmm”, but apparently the software engineers didn’t get the message. That said, I do like FTM for Mac 2, especially its ability to sync with my tree on Ancestry.com. But its interface could stand some improvements.
I successfully follow these steps and have lots of people with pictures loaded. However, sometimes, it just does not work. Are there any workarounds? I’ve tried starting with the person and starting in the media, but neither works for the person’s portrait picture. Yesterday, I tried several things, including closing and reopening FTM. I could not get the person’s picture to load at all. Today, I’ve tried again and finally have the picture I want to add to the portrait but it still won’t show up. Has anyone else had this problem? I’m on MacOS Catalina 10.15.6 using FTM 2019 Version 24.0.1.252. After I finished writing this, I found a workaround: go to my tree on Ancestry, make the picture the profile picture for the person and sync to FTM. It’s the only thing that worked for this once person.
I am having the same issue. So frustrating. Can’t add a portrait to a person. Dang